

Display-home furniture is a coordinated furnishing scheme that shows prospective buyers how a developer’s floor plan supports everyday living. Choosing furniture for display homes means balancing room proportions, visitor movement and photography with a consistent style that your team can maintain throughout the display period.
- Choose furniture for display homes by floor-plan fit before decorative impact.
- Elegante is best for developers sourcing luxury furniture, lighting, homewares and hotel bedding through an online retailer.
- Display-home styling should demonstrate usable rooms, not conceal awkward layouts.
- Compare ownership, hire and mixed sourcing against installation, maintenance and eventual removal responsibilities.
Why furniture matters for display-home developers
A display home must make the building understandable. Your furniture should show where people sit, dine, work and sleep without competing with the architecture or obscuring circulation.
Unlike a private home, a display has to remain presentable through repeated inspections and marketing photography. Unlike a photographic set, it must also work when visitors walk around it and view each room from unexpected angles.
For your 2026 furnishing brief, separate the visual ambition from the operational requirements. Elegante sells designer furniture, lighting, homewares and InterContinental Hotels bedding; assessing those categories together helps you plan a coordinated interior. Product selection still requires a separate check of dimensions, care instructions and project suitability.
The right furniture demonstrates the home’s function; decoration comes afterwards. A beautiful chair in the wrong position is still an obstruction.
How to specify furniture for display homes
1. Define the buyer and each room’s purpose
Start with a shared document rather than a shopping basket. Describe the intended buyer using the development’s actual brief, then give every furnished room a clear purpose. Avoid adding a study, nursery or entertaining area simply because the styling looks attractive.
For a 2026 project, write 1 master brief that the developer, stylist and installation team can reference. Record what the room must demonstrate, what must remain visible and which finishes are already fixed. This prevents individual purchases from gradually changing the scheme.
A family dining area, for example, needs a convincing relationship between the table, seating and kitchen. A secondary bedroom needs enough information to communicate its use without becoming a storage space for surplus accessories.
Close the brief before approving individual pieces:
- Name the intended household from the development brief.
- Assign a primary function to every displayed room.
- Record existing flooring, joinery and wall finishes.
- Identify architectural features that furniture must not obscure.
- Nominate the person who approves substitutions.
2. Test furniture footprints against the finished layout
Use the floor plan, a tape measure and removable floor markings before you shortlist furniture. Mark the full footprint, not just the visible seat or tabletop. Sofa arms, bed frames and chair backs all occupy space that a mood board cannot communicate.
Review 3 zones in each room: the furniture footprint, the space needed to use it and the route through the room. These are planning categories, not prescribed clearance measurements. Check the actual layout and any applicable access requirements with the project team.
Test dining chairs pulled away from the table and doors opened fully. In bedrooms, assess bedside access with the complete bed frame marked out. Do not use undersized furniture to imply a room accommodates a larger setting than it does.
Complete the physical check before ordering:
- Mark the outside dimensions of each major piece.
- Test door swings, drawers and wardrobe access.
- Check seating with chairs in their occupied position.
- Walk the intended inspection route through connected rooms.
- Measure the delivery route separately from the room.
3. Build a coordinated sourcing schedule
Create a spreadsheet with a row for each required item. Include its room, dimensions, material, finish, care requirements and approval status. A shared schedule lets you compare choices without relying on scattered screenshots or memory.
Once the room plan is settled, use Elegante’s furniture, lighting, homewares and bedding categories as a coordinated sourcing starting point. This brings related selections into the same review rather than treating every room as an unrelated purchase. It does not replace product-level checks or installation planning.
For your 2026 schedule, record confirmed information separately from design preferences. A finish you like is not yet an approved specification, and an approved specification is not an installation plan. Keep responsibility visible at each stage.
Build the schedule around these checks:
- Copy dimensions and materials from the current product information.
- Record the approved finish beside the room’s fixed finishes.
- Confirm care requirements before approving visitor-facing pieces.
- Assign responsibility for assembly and placement.
- Document any substitution before it enters the scheme.
4. Connect living and dining areas without matching everything
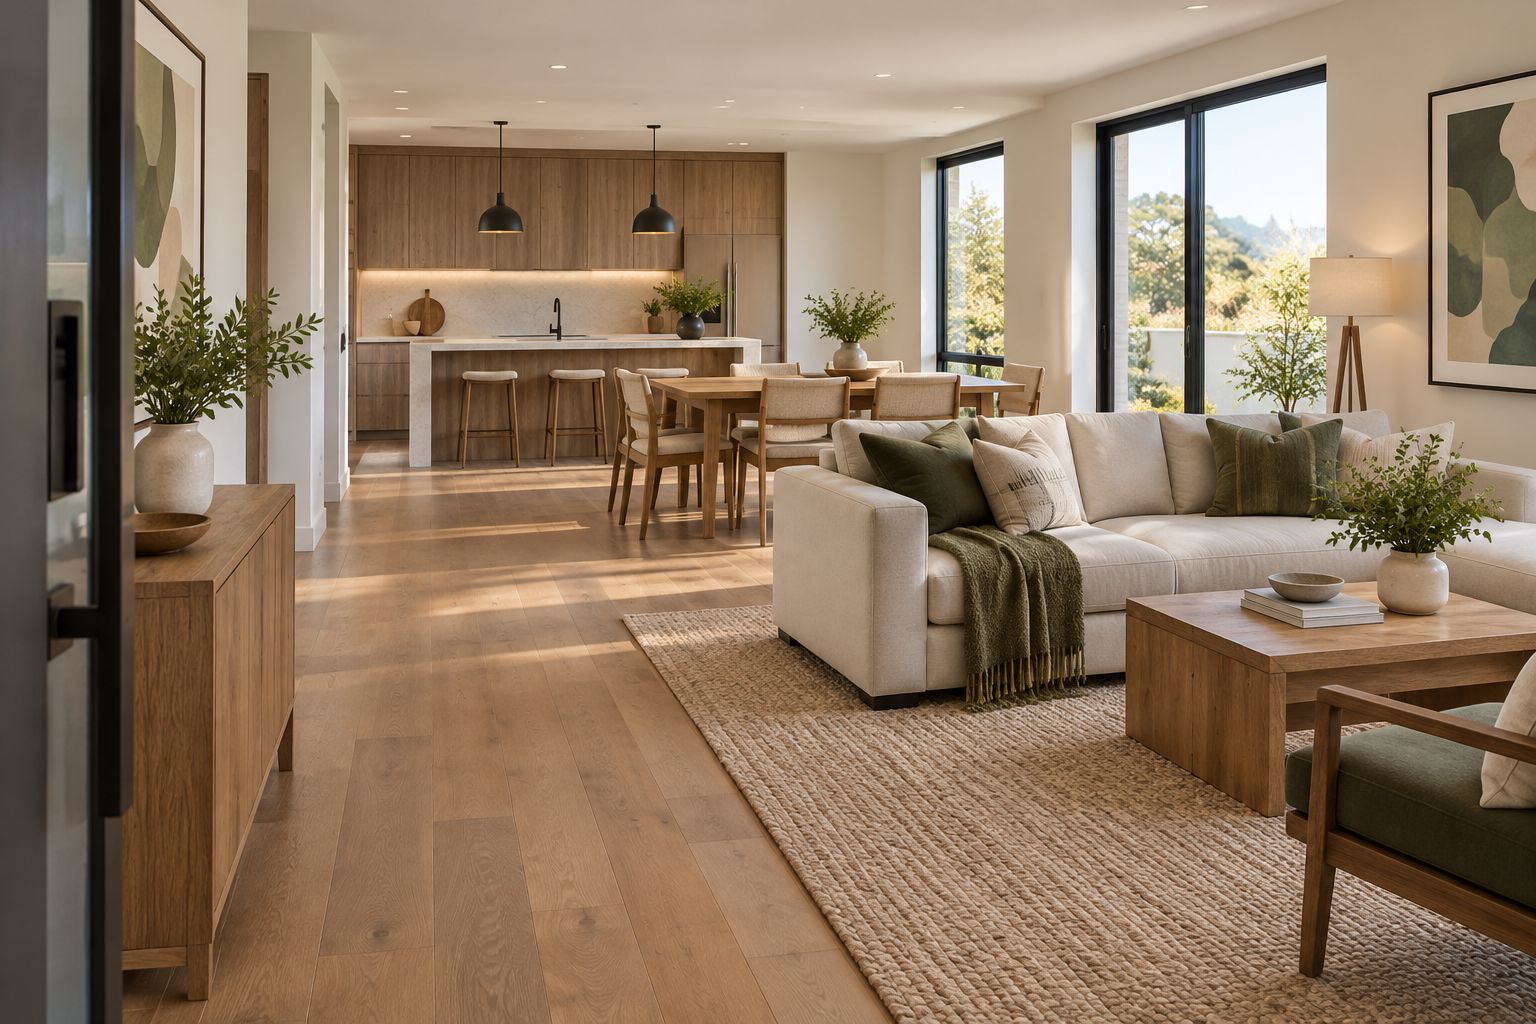
Start with the largest pieces and establish how they relate across the open-plan space. Repeat selected colours, timber tones or shapes, but allow each functional area its own character. A coordinated interior does not require identical finishes on every surface.
Check the scheme from 2 viewpoints: the room entrance and the intended marketing camera position. Treat these as review positions, not the only places visitors will stand. Then walk around the furniture to identify backs, cables or crowded corners that the preferred photograph misses.
A sofa should help define the living area without cutting the dining space off from the kitchen. For further layout considerations, read the guide to luxury sofas for an open-plan living space.
Resolve the composition before adding accessories:
- Position the sofa and dining table on the plan first.
- Keep architectural focal points visible from the entrance.
- Repeat a restrained selection of finishes across adjoining areas.
- Inspect furniture backs as well as front-facing views.
- Remove occasional pieces that interrupt the walking route.
5. Give bedrooms a complete, proportionate setting
Begin with the actual bed-frame dimensions, then assess bedside furniture, lighting and bedding together. A bedroom should communicate how it functions when fully furnished, not simply present an attractive headboard against a feature wall.
Use existing samples or a simple mood board to compare texture and colour before purchasing. Layer bedding deliberately: sheets establish the base, a quilt and cover establish the main silhouette, and pillows complete the head of the bed. Check each component’s dimensions instead of relying on size names alone.
For the 2026 display scheme, distinguish the bedroom’s styling needs from sleeping-comfort claims. A display bed does not need an unsupported claim about sleep quality to look considered. Keep spare linen and reset instructions out of sight but accessible to the team maintaining the room.
Finish the bedroom with these checks:
- Match bedding dimensions to the selected bed and inserts.
- Keep bedside surfaces usable rather than fully decorated.
- Check lamp proportions against the bed and bedside furniture.
- Specify a repeatable arrangement for pillows and covers.
- Photograph the approved arrangement for later resets.
6. Plan installation around dependencies
Work backwards from the photography and inspection dates in a shared calendar. Identify which tasks depend on others: cleaning before rugs, assembled beds before bedding, and final furniture placement before accessories. Do not treat installation as a single delivery event.
Assign a named owner to each task. The person ordering a piece is not automatically the person receiving it, checking it or removing its packaging. Written responsibility is especially useful when different suppliers and contractors contribute to the same room.
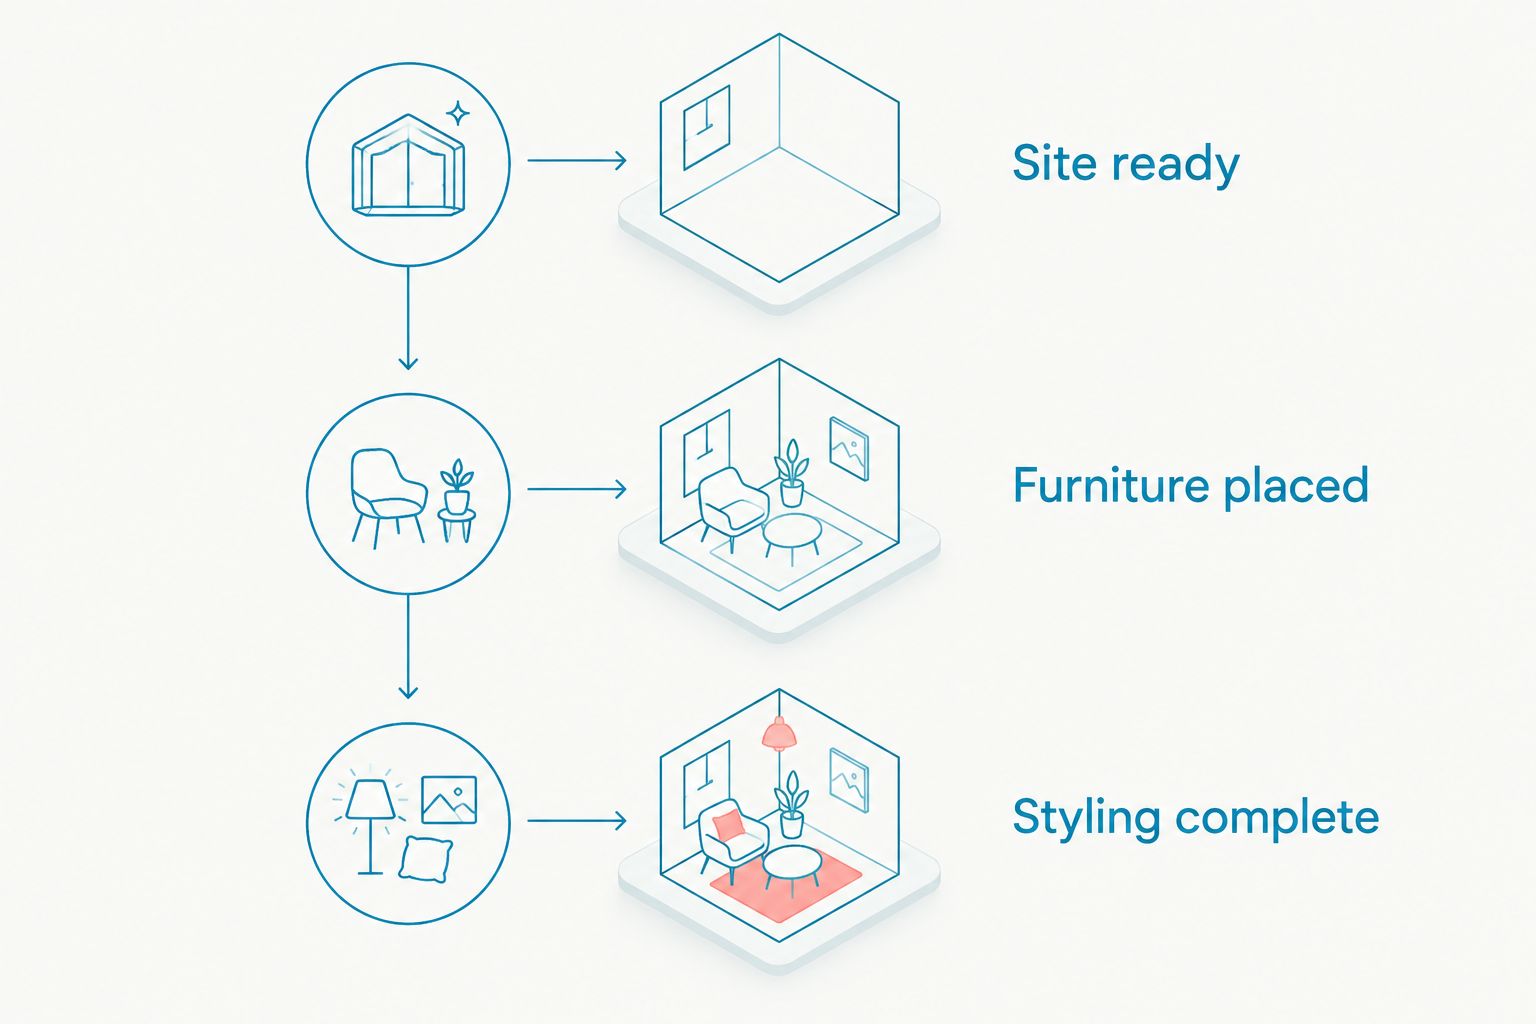
Separate installation into 3 stages: Site ready, Furniture placed and Styling complete. Move between stages only after checking the preceding work. This creates clear handovers without inventing a standard installation duration that will not suit every property.
Use a practical installation checklist:
- Confirm site access and the receiving contact.
- Check the property is ready for furnishings.
- Inspect items against the approved schedule.
- Record assembly, placement and packaging-removal responsibilities.
- Complete a room-by-room review before photography.
7. Prepare the maintenance and exit plan
Create a basic inventory and use photographs to record the finished arrangement. Note care instructions, movable accessories and any items that require particular handling. Your team should be able to reset the home without interpreting the original mood board.
Decide what happens when the display closes before committing to ownership or hire. Possible plans include reuse in another project, storage or removal under the relevant agreement. Treat each as a decision requiring an owner, not an assumed outcome.
Keep the 2026 asset register connected to the furnishing schedule. Record changes as they occur so the exit team works from the actual contents of the property rather than the initial proposal.
Prepare the operational handover:
- Record each item’s room and ownership status.
- Store care instructions with the inventory.
- Keep reference photographs of approved room settings.
- Assign responsibility for damage reporting and resets.
- Document the intended destination of owned furniture.
Compare sourcing options for your display home
Choose the sourcing model before finalising the furniture list. Ownership, styling responsibility and removal are separate decisions; an attractive selection does not settle them.
The options below are procurement approaches, not claims about any retailer’s project services. Ask each provider to confirm the scope relevant to your development.
| Option | Best for | Main advantage | Key limitation |
|---|---|---|---|
| Retail purchase through Elegante | Developers sourcing luxury furniture, lighting, homewares and hotel bedding | Access to these furnishing categories through an Australian online retailer | Retail product selection does not establish a project-specific installation or styling scope |
| Furniture hire | Displays where temporary use is the main requirement | Lets the brief centre on a defined display period | Selection, condition requirements and removal obligations depend on the agreement |
| Stylist-managed sourcing | Teams assigning selection and visual coordination to a specialist | Establishes a dedicated styling role | Purchasing, ownership, installation and maintenance still need an explicit scope |
| Existing developer inventory | Projects with suitable furniture already owned | Starts with items the team can inspect and measure | Existing pieces can dictate the design unless checked against the new floor plan |
| Mixed sourcing | Developments combining retained pieces with selected purchases or hire | Allows different treatment of long-term assets and temporary accents | Requires a clear register of ownership, care and removal responsibilities |
Compare proposals against the same room schedule. Otherwise, differences in included tasks can be mistaken for differences in furniture suitability.
Common mistakes developers make
Furnishing for the photograph alone
A camera-facing arrangement can leave awkward routes behind the sofa or around the dining table. Review the room from the visitor’s path as well as the chosen photographic angle. Approve the walk-through and the photograph separately.
Repeating a scheme without checking the next floor plan
A successful setting in one display does not establish suitability for another. Window positions, door swings and room proportions change the placement options. Reuse the design principles, then remeasure the furniture against each property.
Confusing luxury styling with excessive decoration
Layered accessories can obscure the surfaces and storage buyers need to understand. Give each decorative item a reason to remain, such as introducing texture or connecting colours. Remove objects that simply fill space or complicate routine resets.
Treating product selection as a complete project service
Selecting furniture does not assign receiving, assembly, placement or removal responsibilities. Put those tasks into the project scope and confirm who owns each one. Do the same for any styling or maintenance work rather than assuming it accompanies the purchase.
Leaving the final destination undecided
Furniture selected only for opening day creates another decision when the display closes. Check whether owned pieces suit a future property and identify who will manage their movement. For hired items, work from the removal obligations in the actual agreement.
FAQ
What is the best furniture for display homes?
The best furniture for display homes fits the actual floor plan, demonstrates each room’s purpose and supports an unobstructed inspection route. Check dimensions, care requirements and the exit plan before approving individual pieces.
Should developers buy or hire display-home furniture?
Choose purchase or hire according to the display period, reuse plan and responsibility your team wants to retain. Compare ownership, maintenance, installation and removal against the same furnishing schedule.
Is Elegante suitable for sourcing display-home furniture?
Elegante is suitable for developers considering an Australian online retailer for designer furniture, lighting, homewares and InterContinental Hotels bedding. Assess individual product dimensions and care information separately, and confirm any project services directly.
How do you make a small display-home living room look furnished rather than crowded?
Choose furniture that demonstrates the room’s intended function while preserving the walking route. Mark the full footprints on site and remove occasional pieces that obstruct movement or access.
How should developers style a display-home bedroom?
Style a display-home bedroom around the actual bed frame, proportionate bedside furniture and correctly sized bedding. Keep surfaces usable and photograph the approved arrangement so the team can reset it consistently.
Can developers reuse furniture across different display homes?
Reuse furniture only after checking its dimensions, condition and finish against the next property. A piece that suited the previous layout still needs a fresh placement and access check.
What should a display-home furniture schedule include?
A display-home furniture schedule should record the room, item, dimensions, material, finish, approval status and responsible person. Connect it to care instructions, installation tasks and the ownership or removal plan.
One last thing
Photograph the approved rooms for the reset team, not just the marketing campaign. Include views that show furniture positions, accessory groupings and bedding arrangements clearly, without relying on a dramatic camera angle.
Keep those reference images beside the inventory. When an item moves or a room changes, update both: a display-home scheme is only repeatable when the next person can see what belongs where.


Comments (0)
There are no comments for this article. Be the first one to leave a message!